Rustic Plant Supports
Rustic garden ornaments naturally complement any home garden, whether or not the home itself has a rustic style or setting.

(from carolyneroehm.com)
While anticipating gardening season several springs ago, we posted a Journal article titled Rustic Garden Structures that featured mostly sizable, intricate outdoor rustic structures manufactured by furniture companies such as Old Hickory and Lincraft from the early 1900’s through the 1940’s.
Although that article did describe a pair of large, never-used 1920’s Old Hickory obelisks that we once owned, wooden rustic garden structures typically do not survive long enough to convey into the antiques trade.

(from archive.wiltonbulletin.com)
So to add time-honored rustic designs to your garden, a good option is to make your own simple rustic garden structures using natural, sustainably-harvested twigs, trunks, and branches. It is best to choose rot-resistant varieties such as cedar and black locust so that your handiwork will last longer than one season in the outdoors.
(from hydraz.club)
The following do-it-yourself instructions and design inspirations gleaned from the web focus on three kinds of simple rustic plant supports: trellises, tuteurs, and wattle surrounds. These types of structures have imbued gardens around the world with a traditional rustic aesthetic since at least medieval times, and perhaps as far back as when humans first began cultivating crops.
A Rustic Trellis

(from sunset.com)
Flat trellises can support climbing plants, or be used simply as ornamental backdrops for garden beds or to add architectural interest to the side wall of a house or garden shed.
How to Make a Simple Trellis from Prunings
(adapted from sunset.com/garden/backyard-projects/make-rustic-trellis)
Tools and Materials:
12 straight branches, limbs or canes, each approximately 1″ in diameter:
- Three pieces, each 3 feet long (A)
- One piece, 6 feet long (B)
- Two pieces, each 5 feet long (C)
- Two pieces, each 25 inches long (D)
- Two pieces, each 221/2 inches long (E)
- Two pieces, each 391/2 inches long (F)
One box of one-and-three-quarter inch nails
Hammer
Spool of floral wire
Directions:

The finished structure is 7' 4.5" tall x 3' wide.
1. Trim any side branches from the prunings.
2. Lay the crosspieces (A) horizontally on a flat surface, with two of them 18 inches apart, and the third 16 inches above the center one.
3. Lay the centerpiece (B) vertically across the crosspieces. The bottom end of the centerpiece should overlap the lowest crosspiece by 4 1/2 inches. Nail centerpiece to crosspieces at center joints.
4. Lay side pieces (C) vertically over crosspieces as shown, setting them about 3 1/2 inches in from the ends of the crosspieces. Nail to crosspieces at the joints.
5. Place D and E pieces diagonally between crosspieces, slightly overlapping the horizontal crosspieces as shown. Nail them to the horizontals at the joints.
6. Place top pieces (F) so they cross behind the centerpiece (B) and on top of the side pieces (C).
For additional stability, turn structure over and nail joints from the back side, then wrap wire several times around the main intersections.
Here is some additional inspiration for designing your own rustic trellises:

(from charlottemoss.com)

(from gardenfuzzgarden.com)

(from birdsandblooms.com)
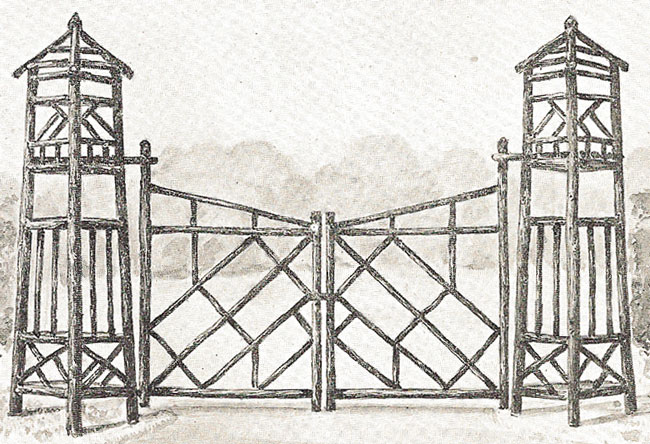
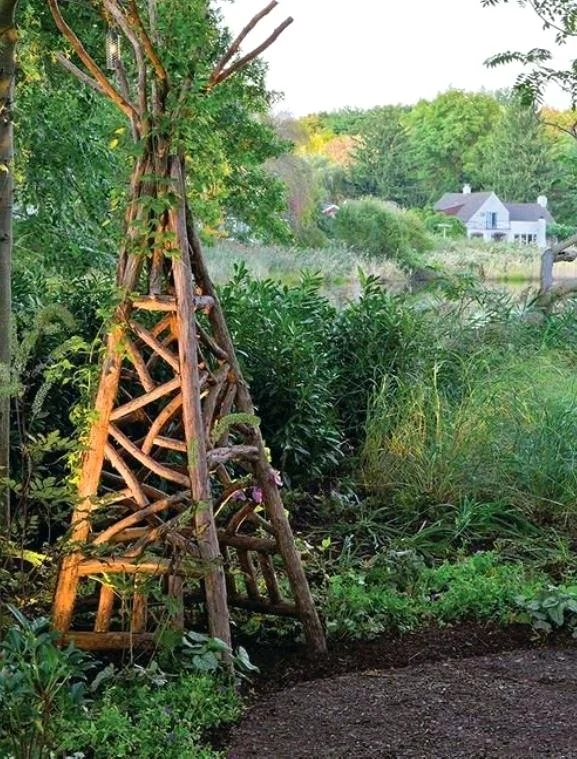
A Rustic Tuteur

(from karmaperdiem.com)
Tuteur means “trainer” in French, thus tuteurs are traditionally used for training climbing plants. Similar free-standing garden structures are also called obelisks and teepees, depending on whether they are rectangular, pyramidial, or circular.
How to Make a Simple Branch and Twig Tuteur
(adapted from karmaperdiem.wordpress.com)
1. Obtain 3 cedar poles and cut them to a height of 6-7’
2. Tie the poles together at the top
3. Use the cut-offs from the cedar poles as horizontal supports for the structure. Secure them to the tall frame with wood screws.
4. Wrap shoots pruned from grape or honeysuckle vines or other thin twigs around the branch frame.
Here is some additional inspiration for designing your own rustic tuteurs:

(from sharesunday.com)

(from lovelygreens.com)

A Wattle Surround

Wattle is a panel, fence, or enclosure that is woven from pliable branches such as willow. Wattling has long been used as a fencing technique to contain livestock and protect pasture.

(from the 15th century French manuscript Très Riches Heures du Duc de Berry)
But wattle also makes attractive, easy-to-construct smaller enclosures for individual garden plants and beds, as shown here.
How to Make a Wattle Plant Enclosure
(adapted from instructables.com and insteading.com/blog/wattle-fence/)
1. You will need both upright stakes for the “sales” and shoots or saplings for the “weavers.”

(from instructables.com)
For weavers it is easiest to work with freshly cut long, straight, slender (about ½” diameter) saplings such as willow, hazel, sweet chestnut, plum, or forsythia (or a mixture these—yellow willow and red dogwood twigs make nice color gradations in the final product). Dry willow can become pliable again by soaking it overnight in a stream, barrel, or bathtub.

(from instructables.com)
Hardwood or a rot-resistant wood such as cedar are good choices for the sales. The length of the sales will define the height of the wattle enclosure.
2. Pound the sales into the ground into a circle of whatever diameter you want your raised bed to be.

(from instructables.com)
3. Begin weaving the sapling rods around the sales like basketry, tucking ends into the weave as you add pieces to continue around the enclosure. Alternate the weaving so that each row is woven on the opposite side of the stake from the sapling below it. Firmly press down each sapling so it sits tightly against the previous row.

(from instructables.com)
4. Fill the finished wattle enclosure with soil and compost, and it is ready to plant with seeds, seedlings, or transplants.

(from gardenista.com)
Here is some additional inspiration for designing your own wattle enclosures:

(from babylonstoren.com)

(from thegardenglove.com)

(from jardinsalanglaise.com)
Rustic Resourcefulness
As with indoor rustic furniture, locally-sourced natural materials inspire the designs for rustic garden structures, even those as simple as plant supports. The impetus for making them may come from practical needs, but for generations they have also satisfied the aesthetic urge to accent our gardens with rustic adornments.

Gardens at Mohonk Mountain House, New Paltz, New York in the 19th century and today. (from prweb.com and theodysseyonline.com)


